![]() It is actually very easy to display gigabytes of custom imagery on Bing Maps with fantastic results, the trick is to know what tools to use. Read on for a streamlined process for the common geo image formats using Global Mapper, SpaceBlock, Windows Azure and a few helpful tips along the way.
It is actually very easy to display gigabytes of custom imagery on Bing Maps with fantastic results, the trick is to know what tools to use. Read on for a streamlined process for the common geo image formats using Global Mapper, SpaceBlock, Windows Azure and a few helpful tips along the way.
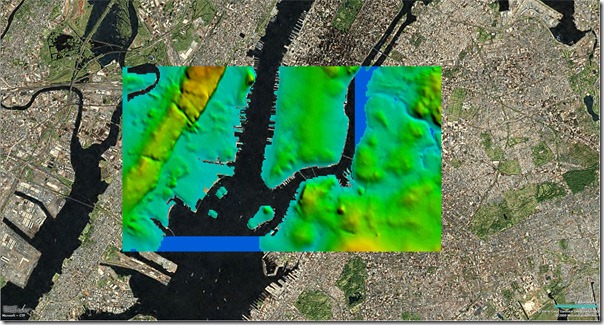
At Bing Map’s core is the ability to render really large images in your browser. Both the AJAX, Silverlight and Mobile versions all use a concept of a tile pyramid to make this possible and effective over the web, you can read more about the tile system in great detail here. Today we are going to look at a process I use to process custom imagery to overlay Bing maps.
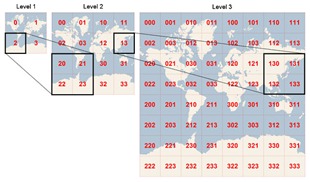
In the GIS field these custom images are called raster images and come in various file formats like GeoTiff and ECW. These formats have the images correctly “projected” and include the location co-ordinates. Since the world is not flat in order to view it on a flat surface, like Bing Maps 2D, all the data needs to be “projected” to the Mercator projection. If your custom imagery isn’t already projected and/or not in a Geo image format then the free MapCruncher tool that I will cover in my next post will be more useful for you. Lets assume you have your imagery ready to go in ECW or GeoTiff format.
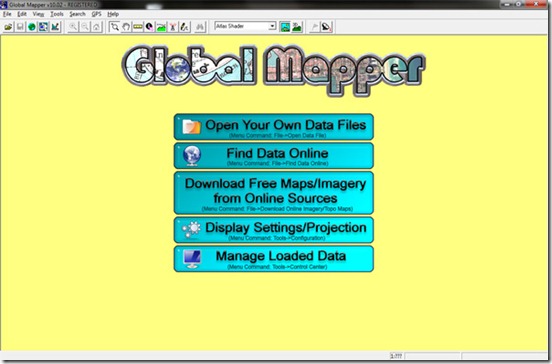
Global Mapper is a very powerful GIS viewer and data convertor. It supports an amazing number of formats and can export directly to Bing Map tiles. You can open one or many of your ECW or GeoTiff files onto a layer an order as you like. The tool isn’t free but is quite inexpensive and a valuable tool for any Bing Maps developer, join their forums first and look for a discount code before you purchase. I’m going to use a built-in free online data source today so I can show you the results online royalty free and you can follow along.
Step 1. Set your projection.
On the title screen it is the fourth option or choose Tools –> Configure. Under the project tab you will see:
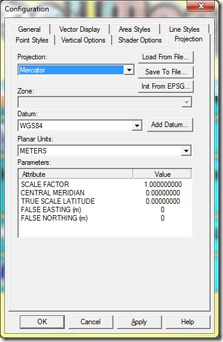
For Bing maps I will choose Mercator and WGS84.
Step 2. Load your data.
Again the welcome screen presents you with 3 options: Open your file, find data online or use a free online source. This is where you would load your GeoTiff or ECW.
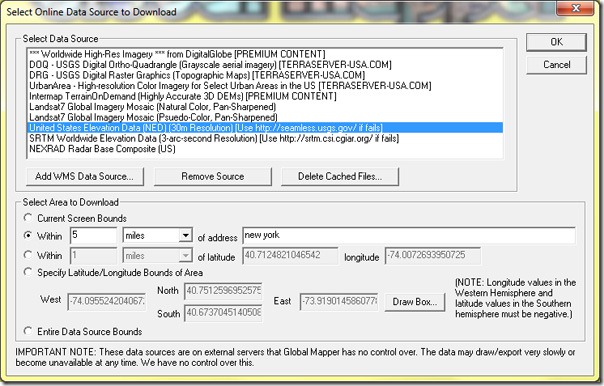
For this article I used the free online data from the USGS using a 5 mile bounds from New York.
Step 3. Set a transparency colour and tolerance.
This one is a little tricky to find. Open the control centre (Alt-C) or Tools –> Control Centre. Select your layer and click on Options. Under the Display tab you can select a colour to be transparent and also set small variations of the colour to also be transparent (useful on compressed images).
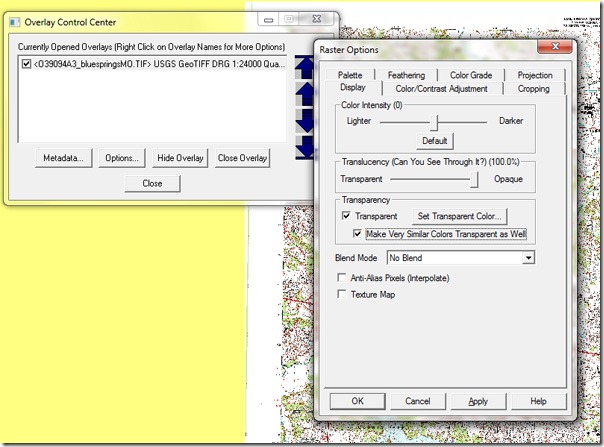
This is important to get a seamless edge on your custom area but be aware that it could turn areas transparent that you don’t want. Once applied you will see that colour now changed to the default yellow background.
Step 4. Export as Virtual Earth tiles
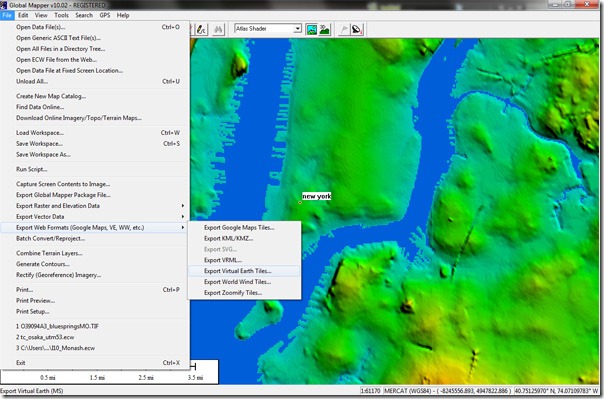
From the File Menu choose Export Web Formats –> Virtual Earth Tiles.
With every increase in level you create four times the number of tiles then the previous layer. Ideally you should try to match the resolution of the source imagery. Set the number the zoom levels to output, it is easy to turn these off later so I normally export all but the top 4-5. For example here I choose level 16 as my highest since the resolution is pretty poor and 10 levels to export, this mean I will have levels 7->16 in Bing Maps. The export bounds can be set to the whole layer, the current screen or simply draw a box for the area you want.
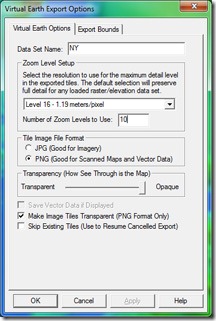
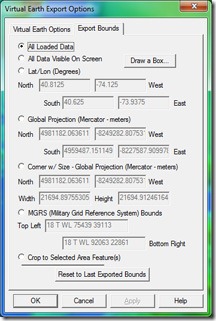
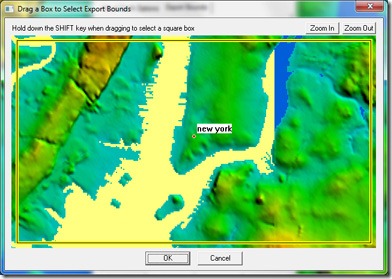
The export process can take some time depending upon the IO performance of your system, I have global mapper setup on a second computer (actually my media centre PC with fast disks) and remote desktop in from my dev machine.
Step 5. Setup Azure storage
We need to host these tiles on the web, we need a system that is designed to serve many small files. I highly recommend using a cloud based service for this, you can evaluate Windows Azure currently for free. Sign up here, it will take about 2-3 days to get your account. Once you have your account, setup a new storage account. You will need to know your storage account name and shared key for the next step. For a full tutorial on Azure see this awesome post from Katrien.
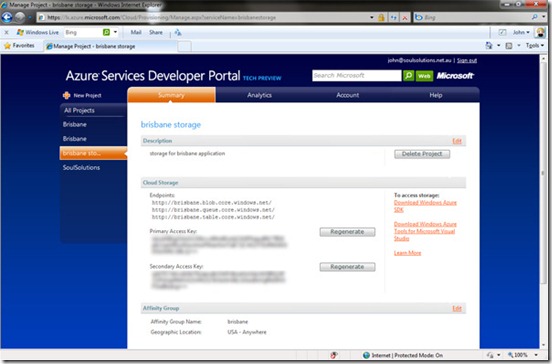
Step 6. Upload to Azure Blob Storage
I use SpaceBlock to upload and explore Azure Blob Storage, it scales well and allows for multiple accounts.
Under Tools –> Options add your azure account using a key from step 5.
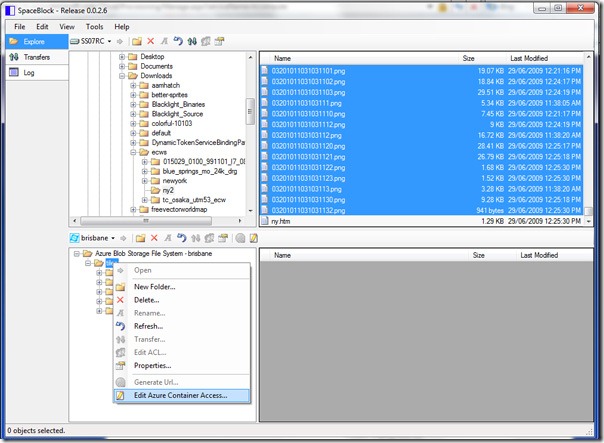
The Azure blob storage can be directly accessed using http, but you need to set the permissions on your container to be public.
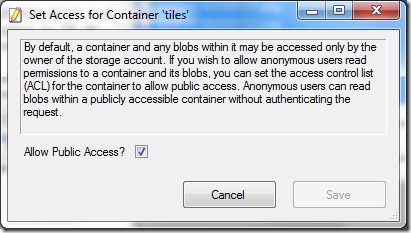
The first level of folders in SpaceBlock for Azure are the Azure Containers, from their all the sub folders are just a neat naming trick that SpaceBlock handles for you. You need only set this permission on these top containers.
Step 7. Use in your application.
Now your tiles are public you need to add a tile layer to your application to show them. In the Silverlight CTP control you can do this in your code behind for a Map called “map”:
using System.Windows;
using Microsoft.VirtualEarth.MapControl;

namespace SoulSolutions.TileExample
{
    public partial class Page
    {
        public Page()
        {
            InitializeComponent();
            Loaded += Page_Loaded;
        }

        private void Page_Loaded(object sender, RoutedEventArgs e)
        {
            var tileLayer = new MapTileLayer();
            map.Children.Add(tileLayer);

            //add the overlay
            var tileSource = new LocationRectTileSource(
                "http://brisbane.blob.core.windows.net/tiles/nyDEM/{0}.png",
                new LocationRect(new Location(40.76026, -74.08459), new Location(40.6874, -73.94211)),
                new Range<double>(7, 16));
            tileLayer.TileSources.Add(tileSource);

            map.SetView(new Location(40.71499, -74.00734), 14);
        }
    }
}
In the AJAX control you do this (complete page):
<!DOCTYPE html PUBLIC "-//W3C//DTD XHTML 1.0 Transitional//EN" "http://www.w3.org/TR/xhtml1/DTD/xhtml1-transitional.dtd">
<html>
   <head>
      <title>SoulSolutions Tile Example AJAX</title>
      <meta http-equiv="Content-Type" content="text/html; charset=utf-8" />
      <script type="text/javascript" src="http://ecn.dev.virtualearth.net/mapcontrol/mapcontrol.ashx?v=6.2"></script>
      <script type="text/javascript">
         var map = null;
         var tileLayer;

         function GetMap()
         {
            map = new VEMap('myMap');
            map.LoadMap(new VELatLong(40.71499, -74.00734), 14, 'a', false);
            GetTiles();
         }

         function GetTiles()
         {
             var bounds = [new VELatLongRectangle(new VELatLong(40.76026, -74.08459), new VELatLong(40.6874, -73.94211))];

            var tileSourceSpec = new VETileSourceSpecification("lidar", "http://brisbane.blob.core.windows.net/tiles/nyDEM/%4.png");
            tileSourceSpec.NumServers = 1;
            tileSourceSpec.Bounds = bounds;
            tileSourceSpec.MinZoomLevel = 7;
            tileSourceSpec.MaxZoomLevel = 16;
            tileSourceSpec.Opacity = 0.8;
            tileSourceSpec.ZIndex = 100;

            map.AddTileLayer(tileSourceSpec, true);
         }
      </script>
          <style type="text/css">
    html, body {
        height: 100%;
        overflow: auto;
    }
    body {
        padding: 0;
        margin: 0;
    }
    </style>
   </head>
   <body onload="GetMap();">
      <div id='myMap' style="position:relative; width:100%; height:100%;"></div>
   </body>
</html>
And of coarse you can change to 3D mode and get this awesome effect:
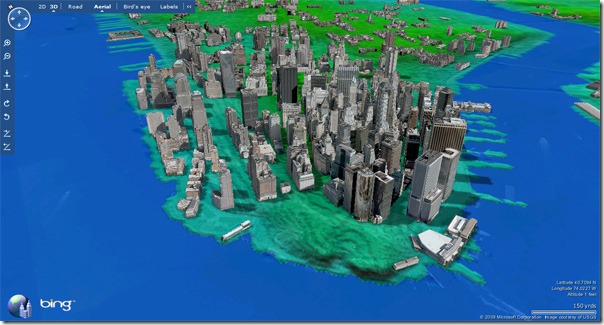
In both examples you have to specify:
- URL to the tiles, with parameter to be replaced with quadkey filename
- The bounds of the tile layer
- The valid zoom levels
Thankfully GlobalMapper produces a .htm file in its output path that will specify these settings for you. However I find it is a little generous and I then use my location chooser to trim this down a little.
I hope you enjoyed this article and feel inspired to tile out your own custom imagery and overlay on Bing Maps to enhance your application.
